Facial Animation
Texture-based. Basically, we use a texture like this and shift the UVs around:
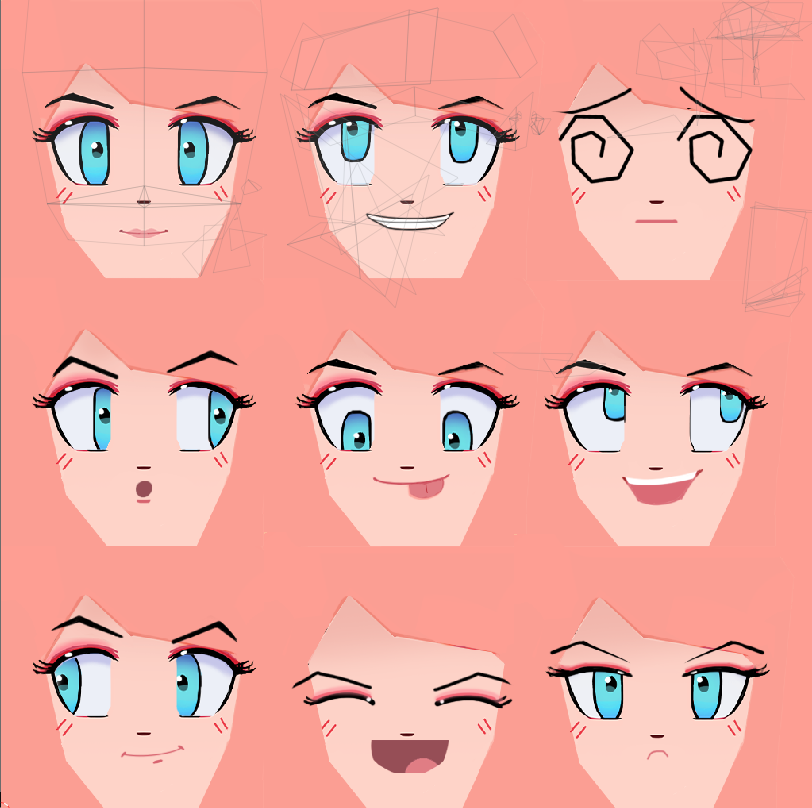
You can export a UV Layout like this:
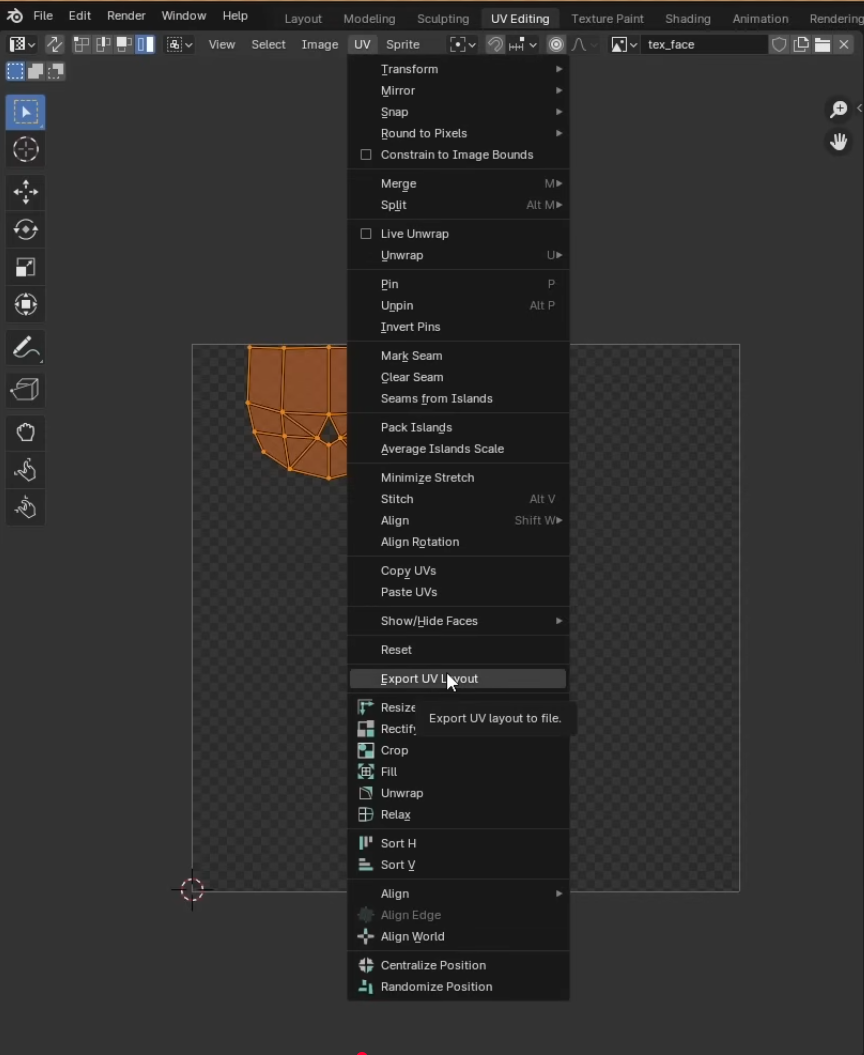
Paint in an external program like Krita, maintaining a consistent grid distance. Then, use a material like the one below to animate the offsets in blender, giving us control over expressions:
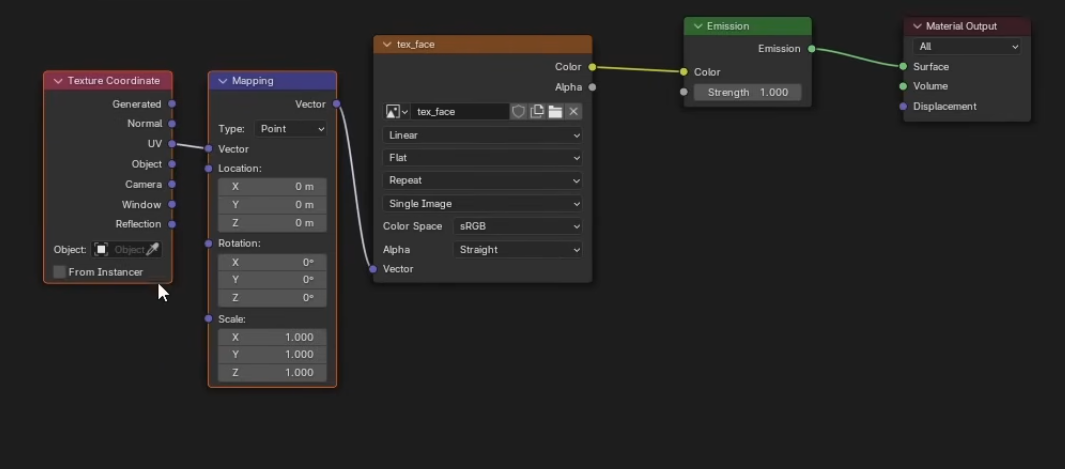
You animate the Location input of the Mapping node at regular distances (in the case of a 3x3 grid above, intervals of 0.33. 4x4 would be 0.25 intervals) to produce different faces.
You can use a chain of mix nodes with a single Value node and some math to make this easier:
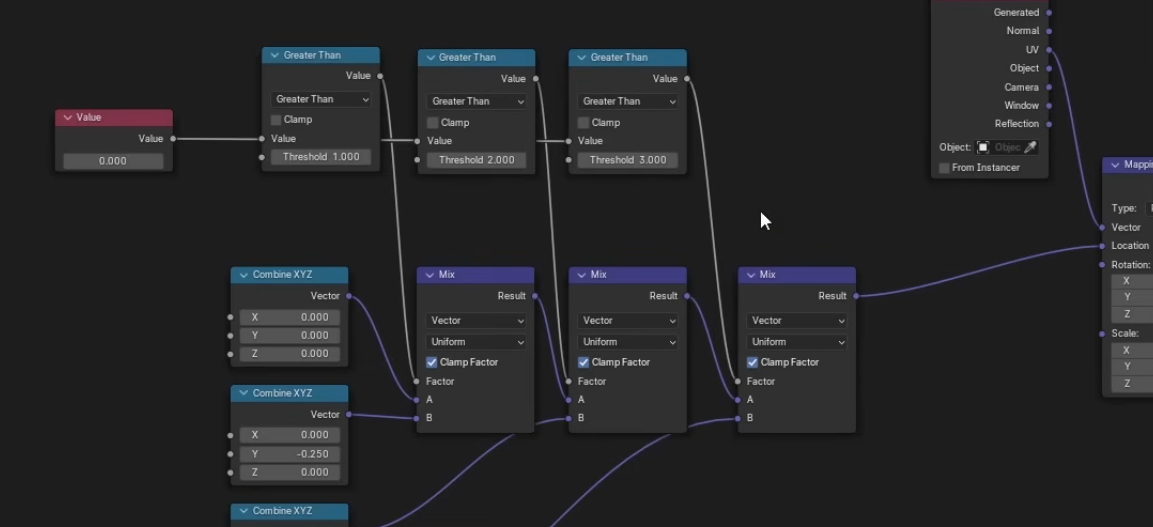
You can take this a step further with Drivers in the rig. Place a bone next to the head and make the bone's position to the Value.
See Here
Sources:
- https://www.youtube.com/@mallbat/videos
- https://www.youtube.com/channel/UCeQwCalZK1scamopwHt9UWw
- https://www.youtube.com/@marioradioshow
- https://www.youtube.com/@CrashsuneAcademy
- https://www.crashsune.com/blender-freebies
- https://www.youtube.com/watch?v=E96m9Z4iTcc
- https://www.youtube.com/watch?v=-XYryP_GU8o